General Settings
The General Settings section is the starting point when you set up a new AI Assistant (Genie). Here is a breakdown of the different sections:
Overview
-
Genie Name: The name you use internally for this Genie. It is only for internal purposes, to distinguish this Genie from others in the dashboard.
-
Genie Status: Toggle the status of your Genie (enable/disable). Selecting "off" keeps the Genie inactive from your website but preserves its settings.
❗️ This is an important button, as it allows you to easily disable the Genie if you don't want visitors to interact with it, without the need to uninstall it.
Sources
-
Knowledge Scope: Select the Workspaces whose data you want to chat about. myGenie needs to have the right knowledge and information to answer customer questions. Click here to find out more about Workspaces.
❗️ It is important to note that every Genie has to be associated to at least one Workspace. This is where it will take the information from to answer the questions.
-
Message Sources: There are two toggle options, to enable or disable:
- Show websites: Let customers view the websites used to answer the question, for personal reference or further reading.
- Show files: Let customers view and download the files used to answer the question (pdfs, documents, etc.) for personal reference or further reading.
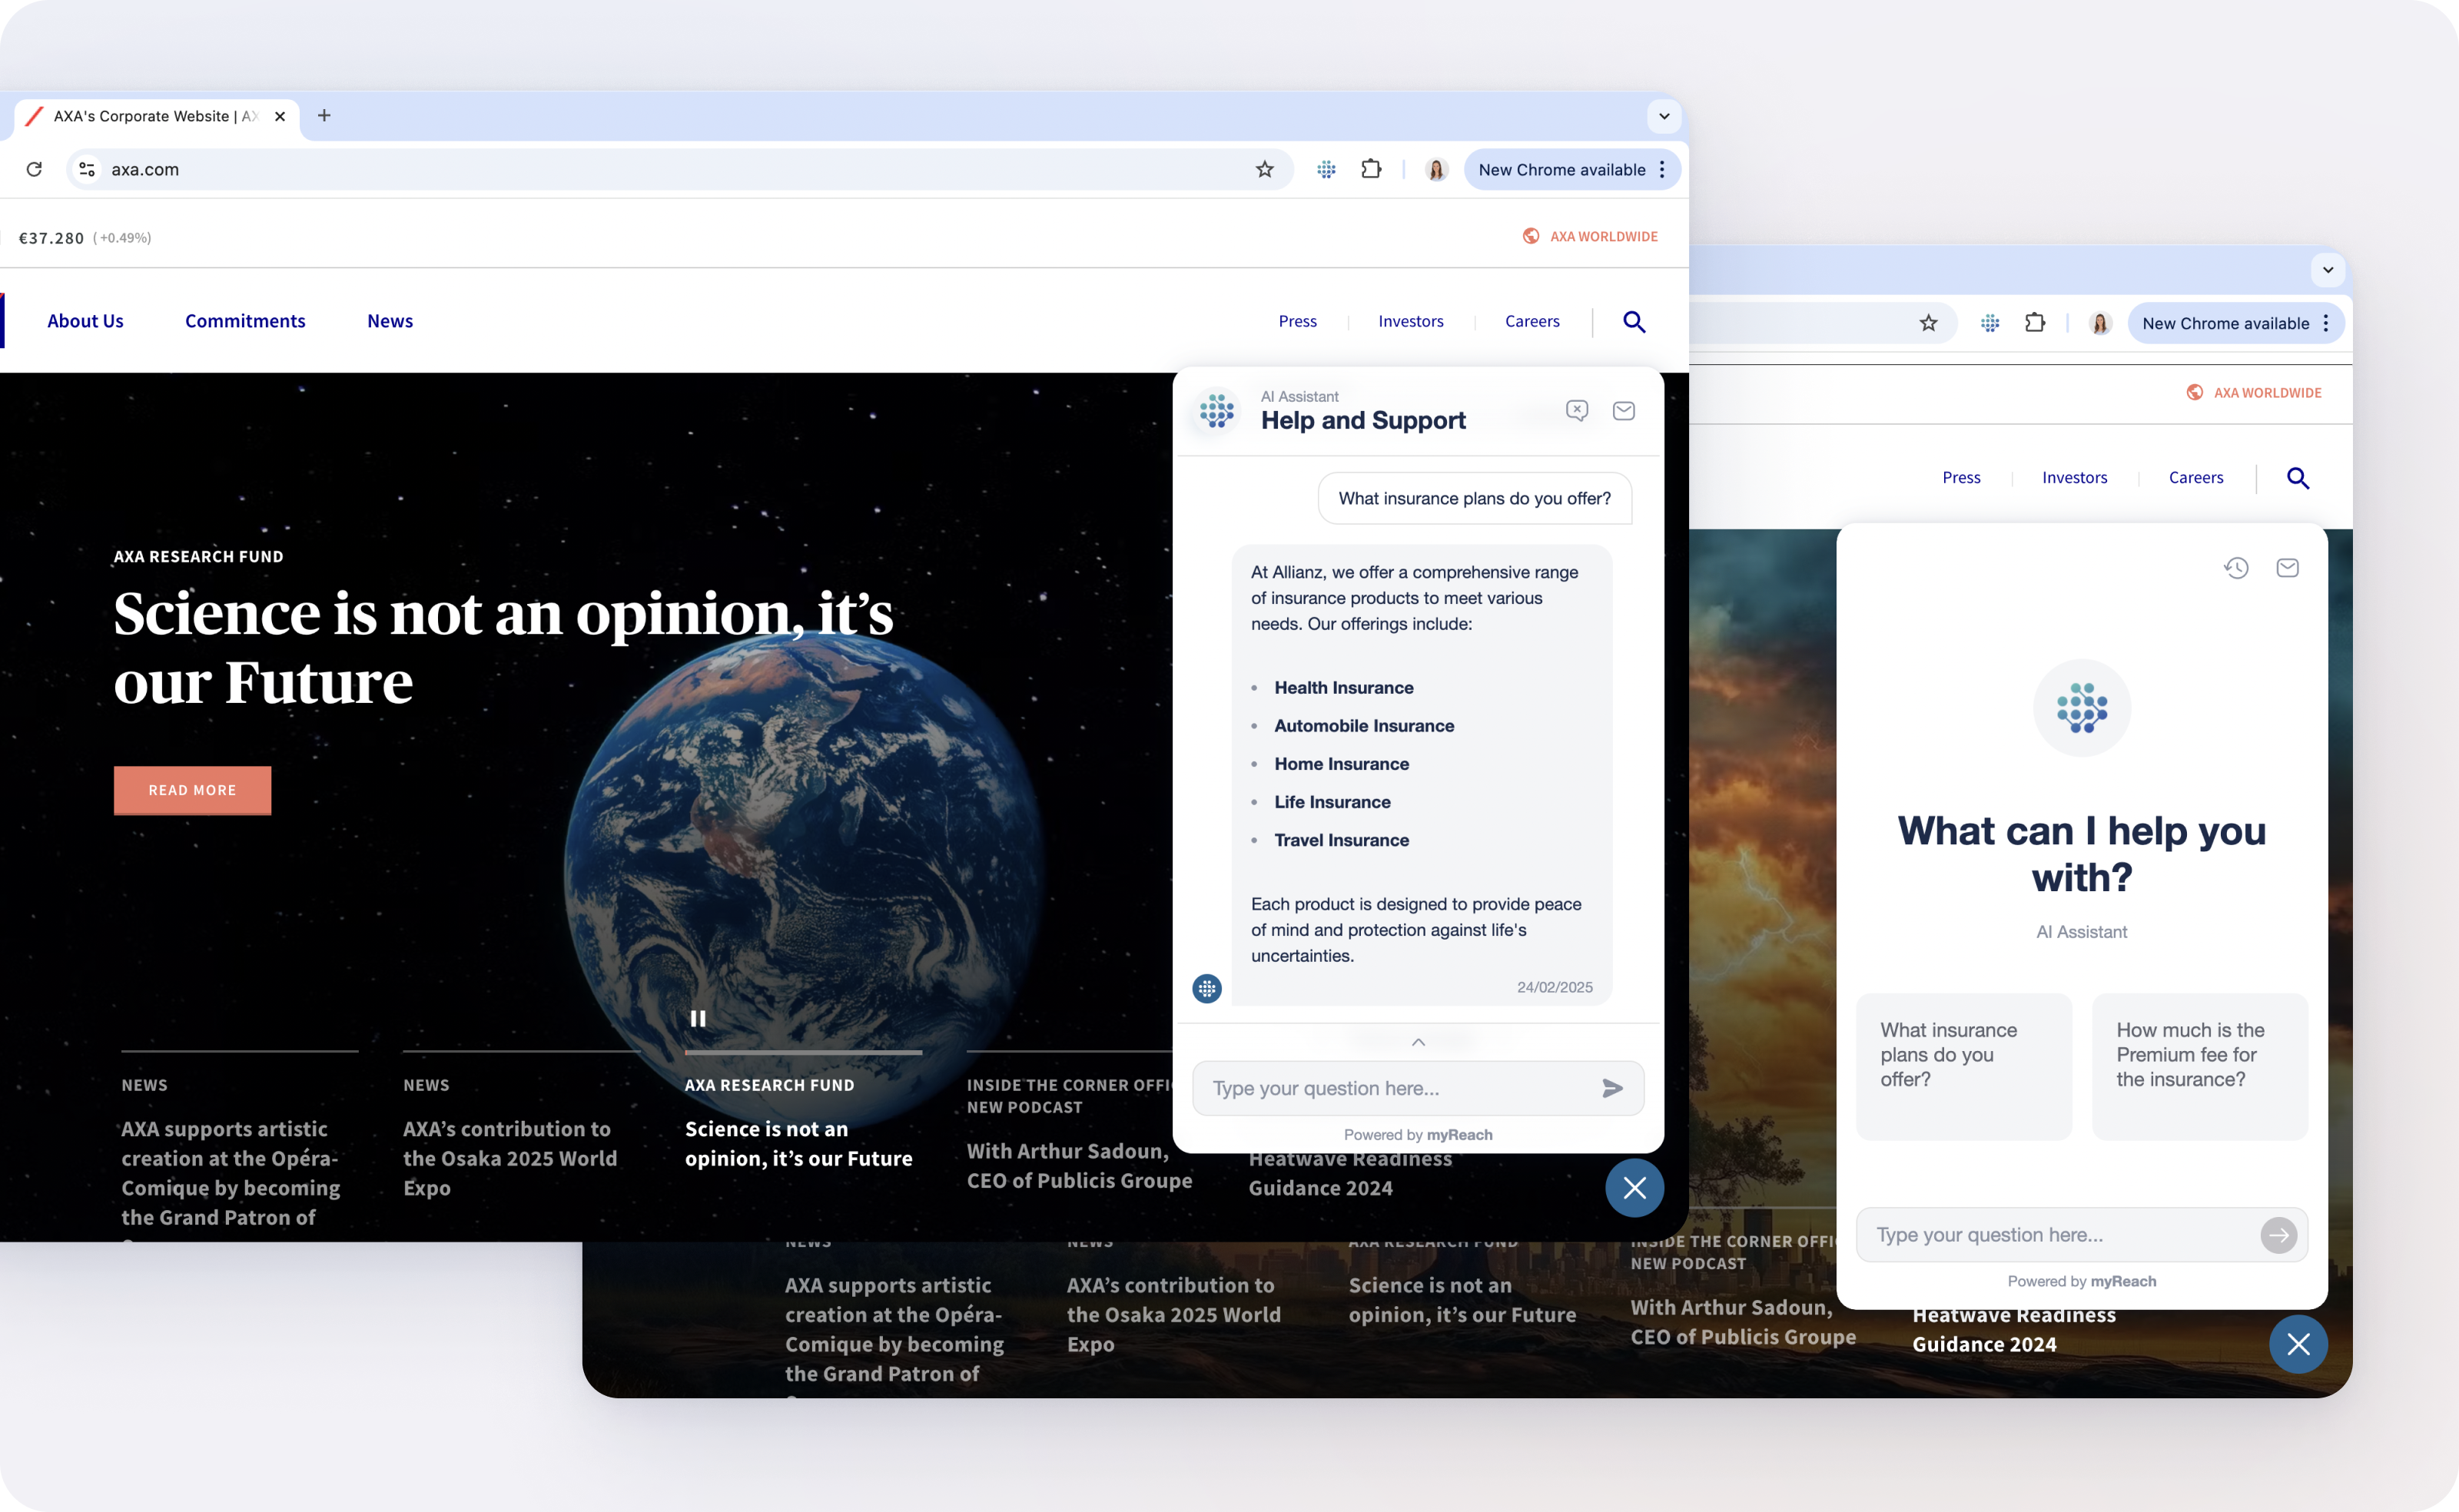
Chat Interface
You now have the flexibility to choose from two chat interfaces, to customise the chat display style once it's on your website:
-
Conversational: A classic chat setup featuring a conversational format with familiar text bubbles, separating user and AI responses for clarity. This has been the default until now (left option in the image below).
-
Assistant: Designed for an immersive experience, this interface provides an informative layout with an initial welcoming design before the chat begins (right option in the image below).
Adjust your preference anytime in the Genie’s General Settings.
Chat Setup
-
Script: Copy and paste this script to add the Genie to your webpage. Click here for a step-by-step guide of how to add the Genie to your webpage.
-
Direct chat link: A shareable URL for testing or sharing your Genie. Find out more about it here.
-
Contact button: The URL or email address of your company that is associated with the Genie for further communication (ex: help@yourcompany.com). This is where the user will be redirected when they click the contact button.