Create a Genie
It's a simple process that only requires a few minutes of your time and no technical expertise.
❗️ You cannot create a Genie if you don't have any Workspaces. You need to import your company's knowledge into a Workspace first. This is where myGenie will get its knowledge from, to answer all the queries.
❗️ Click here to learn more about Workspaces and how to import your knowledge (files, handbook, company policies, website pages, etc).
Steps to create a Genie
Follow these steps to set up your first AI Assistant (Genie):
⚠️ Remember to click the save button (top right of the page), so you don't lose your changes.
-
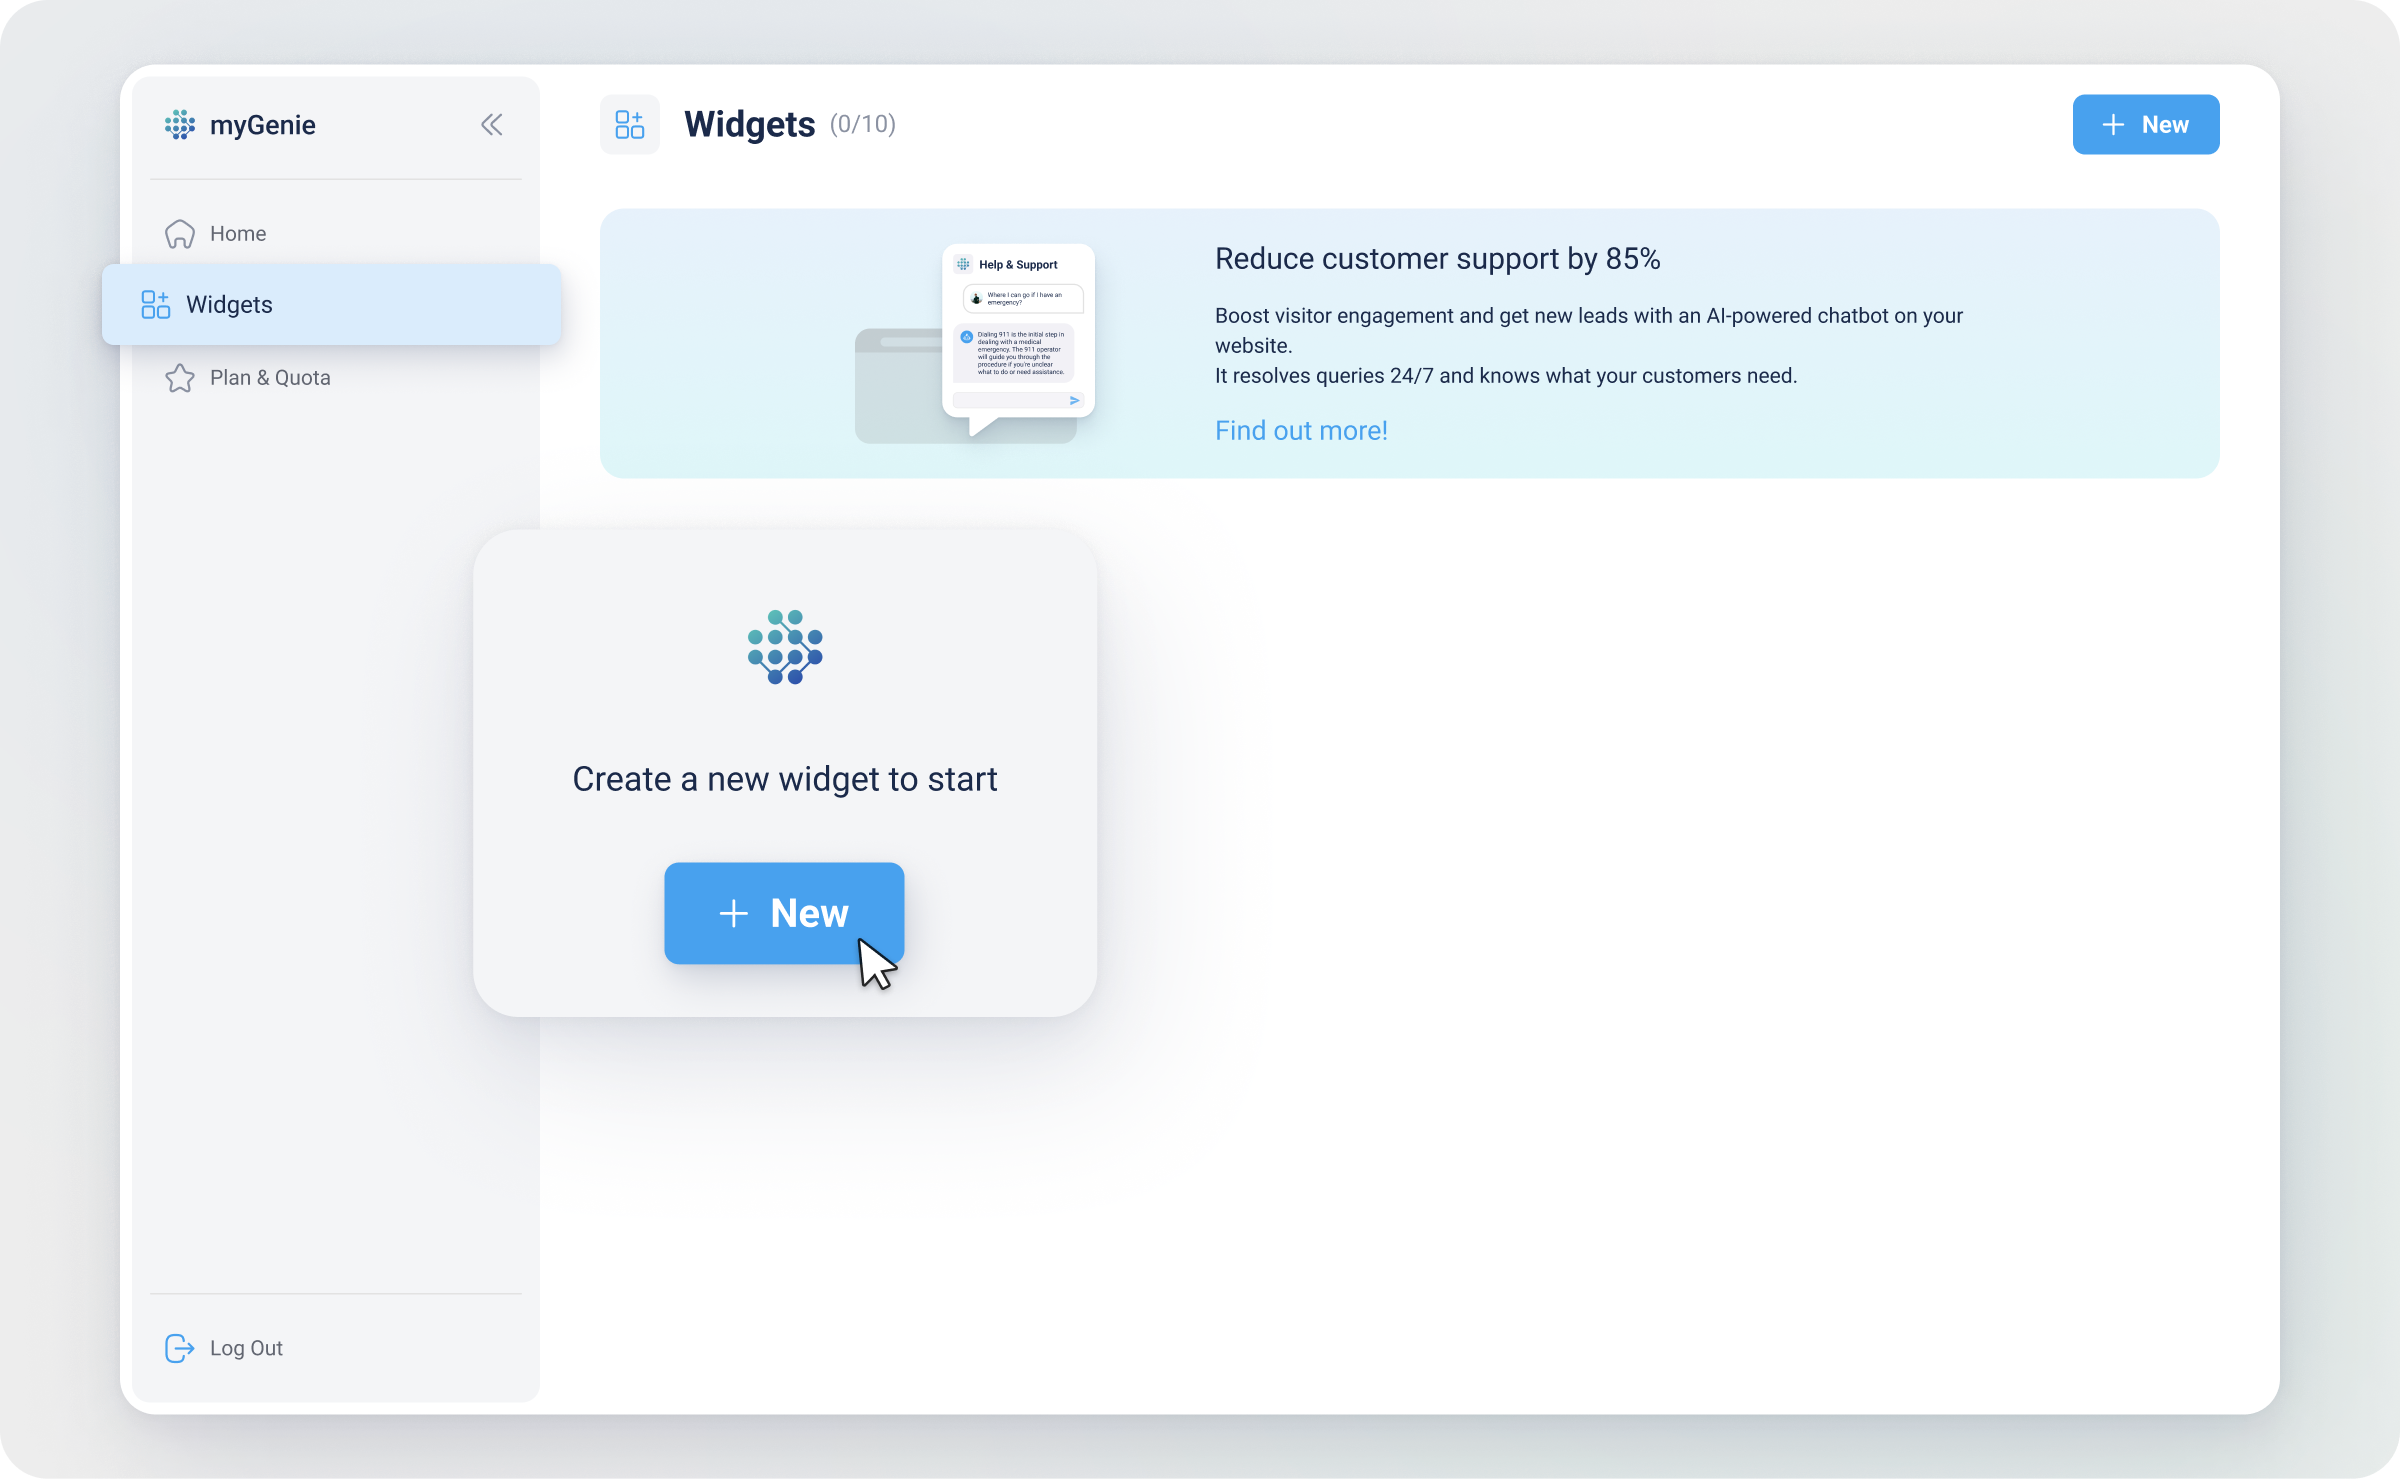
Login to myReach and navigate to the myGenie section on the left sidebar.
-
Click on +New to create a Genie.
-
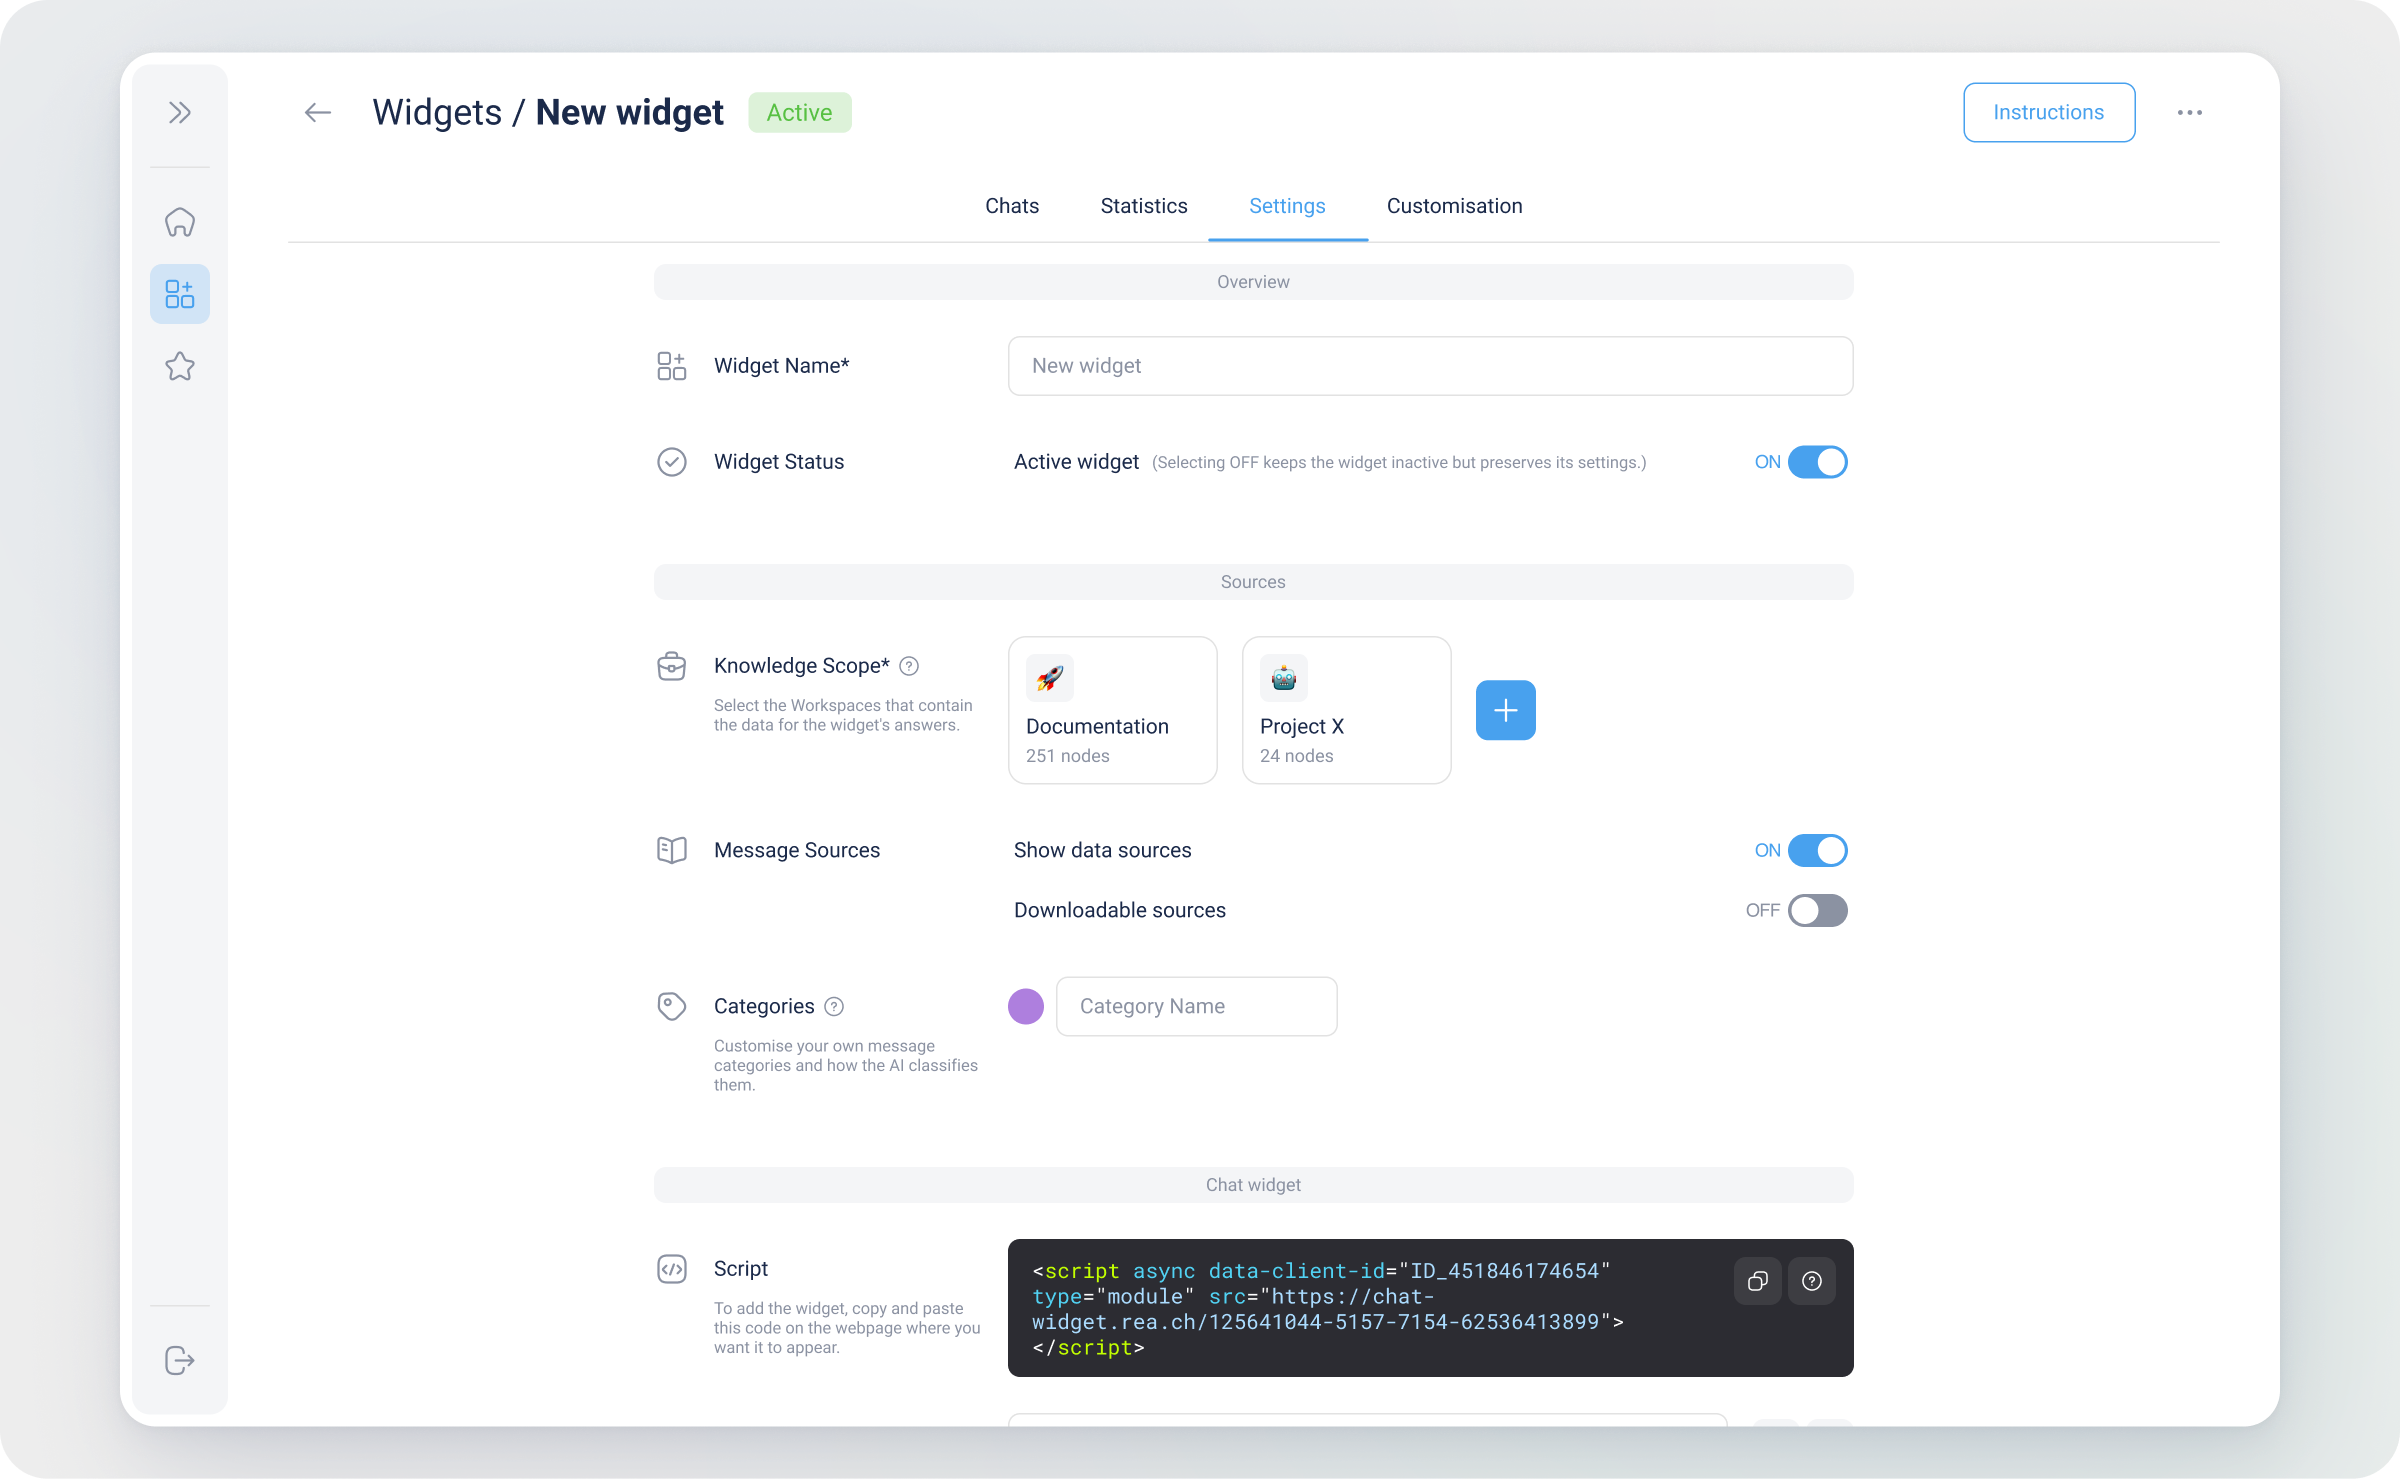
In the settings tab, head to the General Settings section, and fill in the required fields (marked with a *):
- Genie Name: The name you use internally for this Genie. It is only for internal purposes, to distinguish this Genie from others in the dashboard.
- Knowledge Scope: Select the relevant Workspace(s) containing your company's information. The AI Assistant will only be able to answer questions based on information in the selected Workspace. You can add one or multiple Workspaces here.
⚠️ You will not be able to proceed or save your changes if you don't add any Workspaces here. - Contact Email: The company email that you want to link, for customers to reach out to in case of needing additional help. By default this email is the one of the myReach account, but you can change it here.
Once you've followed these steps, the basic part of your Genie has been created. It's now time to customise it to fit your company's style and tone. You can also give it instructions as to how it should behave, as well as create categories for the AI to automatically categorise all incoming questions and create follow-up questions. There is a dashboard where you can see statistics about the messages you're receiving, and more. Find out more about these next steps here:
Customisation
Click here to discover all the ways you can customise your AI Assistant. From the colours of the chat, to the welcome message, to the size and placement of the chat, the quick questions that you suggest to the user, and even if you want it to be more of a conversational interface or like an Assistant, designed with an informative layout to enhance the full-screen experience. The possibilities of customisation are endless, it's up to you how you want to tailor it to fit your company's style.
Categories
Click here to learn how to customise your own message categories and how the AI classifies them. Create follow-up questions when a user asks something about a specific category. For example, if a potential lead is on your website asking questions about pricing and subscriptions, the AI can detect this and redirect them to the page where they can join Premium, with a 10% discount that you choose.
AI Persona
Click here to learn how to adjust the Persona of your AI Assistant. This allows you to define how you want it to communicate, ensuring it engages with users in a way that fits your company's style. For instance, an ecommerce that sells hoodies for teenagers might communicate differently to their customers, than an insurance company would to their potential clients. You can also give it specific instructions about your company, that it can follow. Essentially, the AI Assistant acts as another employee of the company, so give it the same manners than are expected from the employees.
Dashboard Analytics
Click here to discover all the statistics that the AI compiles, about the chats and about the people asking questions. You can use these statistics to understand your target user, how they're using the AI Assistant, what information is missing on your website, what you need to do to improve your company metrics, and more.
Integrations
Click here to find out more about the platforms you can synchronise myGenie with, to streamline your operations and boost your business. Right now, the main integration available (on top of all the myKnowledge integrations), is the sync with Shopify, to enhance customer engagement and streamline the operations of your store.

