How to install myGenie on your website
To install a Genie, you will need to copy a short script from myGenie Settings to your page's code. Here's a quick step-by-step guide to install it:
The myGenie script works with regular websites as well as Single-page applications (SPAs).
If you're using Google Tag Manager (GTM) or a similar tool, you can add the myGenie script the same way you would add a tracking pixel.
Step 1: Get your Genie embed script code
-
Login to myReach and head to the myGenie section on the left sidebar.
-
Click on your Genie, or click +New to create a new Genie.
-
Go to the General Settings section in the Settings tab.
-
Scroll down to the Chat Setup section and copy the script provided.
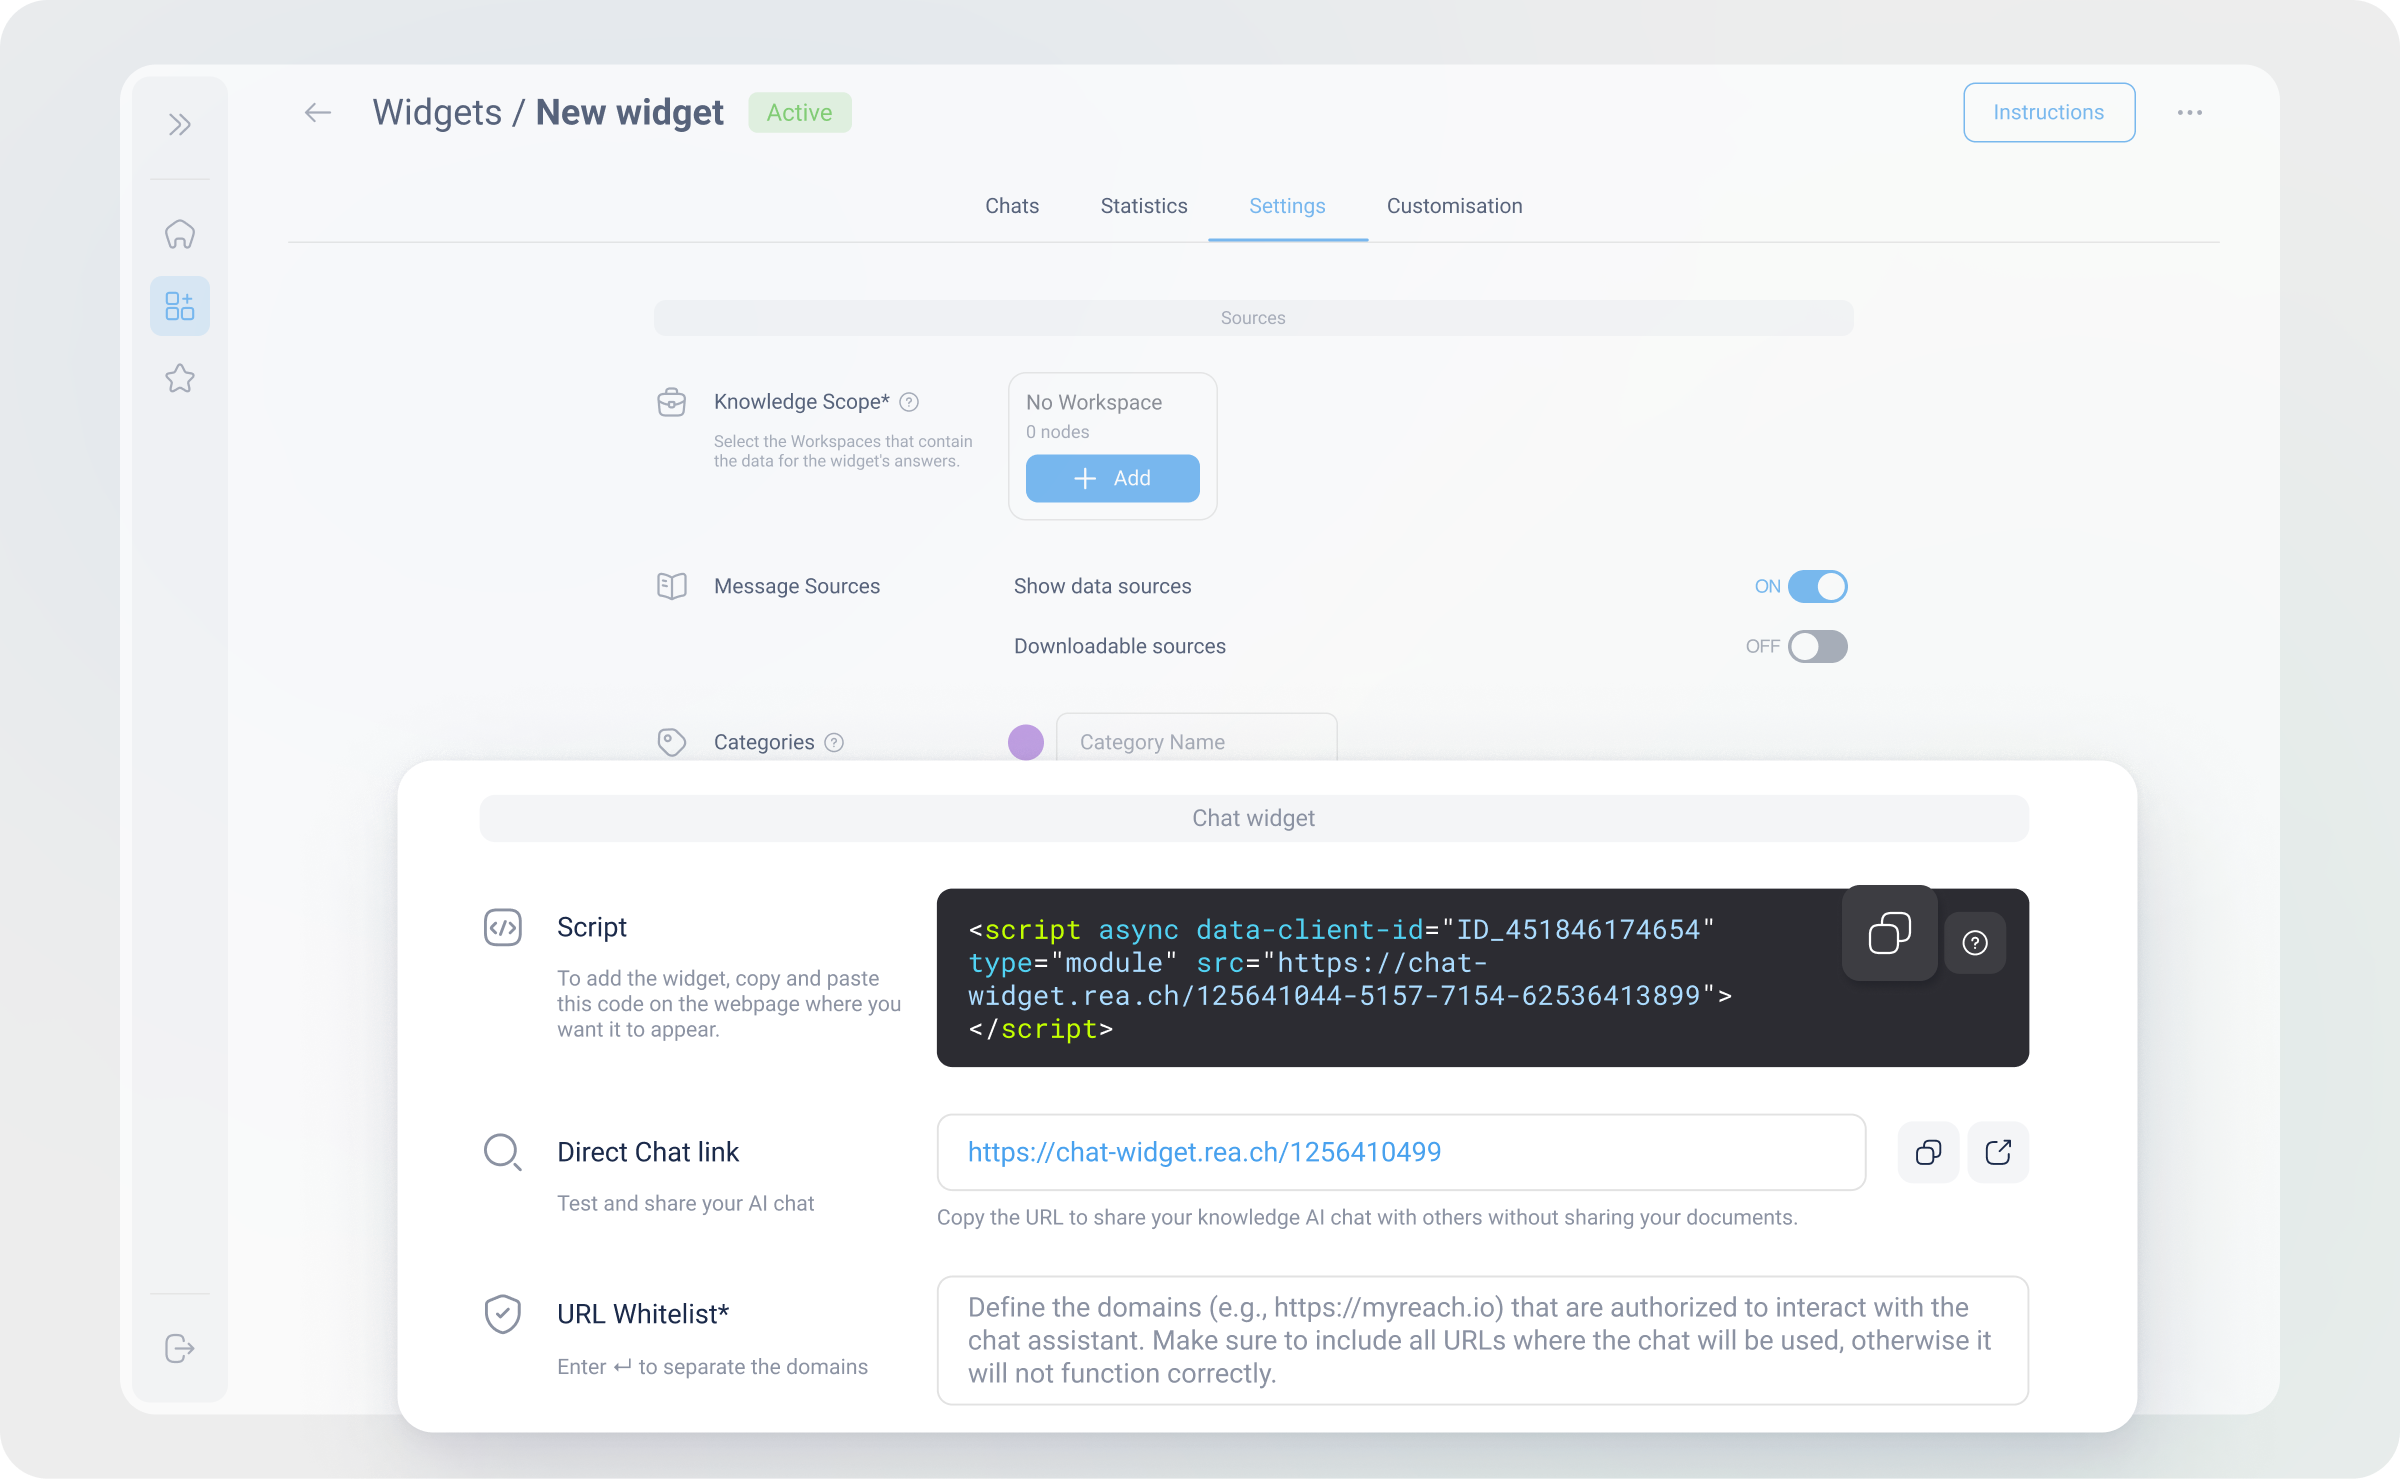
Step 2: Install the script in your website
-
Open the HTML code of your site.
-
Paste the script into the HTML header of each page where you want to display the Genie.
-
Save all changes made to your website's HTML
Step 3: Enable the Genie
-
Go to myReach and navigate to the General settings in Settings tab in the widgets section.
-
Use the Genie status toggle to activate and deactivate the Genie.
-
Test the chat to confirm it's functioning correctly and providing a smooth user experience.
See below, for specific instructions to install the Genie on some of the most popular website builders: